Sunday, June 19, 2016

Mature Skin


Oh the joys of getting older...

I see a lot of women struggle with their makeup routines as they get older. 
Many have stuck with the same routine from their teens and early twenties. 

While it may seem harmless, not updating your makeup look, you could be aging yourself even more! 
So how can you look your best with each passing decade? 
Love your skin, and update your makeup routine to fit your lifestyle.

So let's recap with some Do's and Don'ts for mature skin makeup...


*photo by Clayton Hauck, h/mu: Jen Brown

DO...
Use hydrating products. 
One of the downsides of aging skin is a lack of moisture. It's very important to always moisturize before makeup and to use lightweight, hydrating products. These products won't settle into any fine lines and will help to keep skin bright and luminous.

Foundation: Try any of these beautiful foundations...

Makeup Forever Face and Body Foundation: 
Light to medium Coverage


*photo c/o makeupforever.com


This very light weight, hydrating, water based foundation is perfect for very light coverage to medium coverage. Built to layer on the skin, this has a satin, natural finish-- creating the look of dewey, healthy skin.
$43

Makeup Forever Liquid Lift Foundation: 
Fuller more Medium Coverage

*photo c/o makeupforever.com

An oil free makeup that "lifts" the skin and fills fine lines. It has a fuller more medium coverage.
$44

Cream Blush: I always opt for a cream blush on my clients- it's a soft/natural wash of color and again, the creamy texture won't settle into any fine lines and help to keep a glowy, youthful effect.


Tarte Cheek Stain: 

*Photo c/o tartecosmetics.com

Super easy application of this sheer based cheek color that lasts for up to 12 hours. 
It has a natural looking tint that brightens. Apply directly from tube onto the apples of the cheeks and use your fingers to tap it up to the cheekbones. This can be  used on the lips too!  *
$30

Concealer: Choose a hydrating, light weight concealer like...

Eve Pearl Pearlfx Liquid Salmon Concealer and Eye Brightener: 

*photo c/o evepearl.com

Lightweight liquid concealer that covers the toughest dark circles.
This concealer is layer-able and sheer enough not to sink into fine lines. With a built in brush you can target those troublesome areas easily.
$40

DON'T...
OVER powder! 
Many older women get freaked out if I pull out a loose powder to set their makeup. They truly believe that no powder should be used...
And while yes, powder can settle into fine lines, it really depends on the type of powder and how much you're using. That's why I always tell my mature women clients to stay away from powder foundations (the lack of moisture in the skin leaves the foundation sitting on top, making it look chalky and obvious).

Powder: Avoid emphasizing what you're trying to tone down by using a finely milled loose powder like...

Shiseido Translucent Loose Powder:

*photo c/o shiseido.com

This invisible powder melts into skin and compliments every skin tone.
Apply lightly with a fluffy brush to areas that need setting (usually the T-zone and a little under the eyes).

DON'T ...
Be afraid of color! 

As we get older we lose a lot of color in our cheeks and lips.


The best way to add that youthful appearance back is to incorporate color into your makeup routine. Use a lip tint, and don't forget to add blush to those cheeks! And just because you're over 50 doesn't mean you have to own a neutral eye palette! You can still pull off greens, and golds, and violets if you want.


I love this look on a Mother of the Bride I had a few years back. We incorporated golds and deep purples on her eyes with a pop of lip color! 

Some things to keep in mind... 

*When playing with color...
 Remember to keep a balance. Color can be tricky at any age! So really pay attention to what speaks to you-- trust me, you know more than you think! Go with your gut on this and have fun with it! The more you play, the more you learn! 

*When playing with metallics... 
Try to keep shiny, shimmer, and metallic shades away from crepe-y or wrinkled areas of the eyes/skin. The bright texture will only call attention to them. Try to pick an area of the eye where skin is taught. 

*When lining your eyes... 
Focus on softening the liner as you get older. Use less harsh blacks and move into navy's, grey's or brown's. 
A great tip is to use a pencil or gel and top with a shadow to soften any harsh lines. As we get older, our features tend to soften, and with that, so must our makeup. 

I hope this post was helpful for you! If you have some favorite tips, or additional questions, please feel free to share in the comments section!

In the meantime, take the time to love the skin you're in and work with your best features!


Monday, June 13, 2016

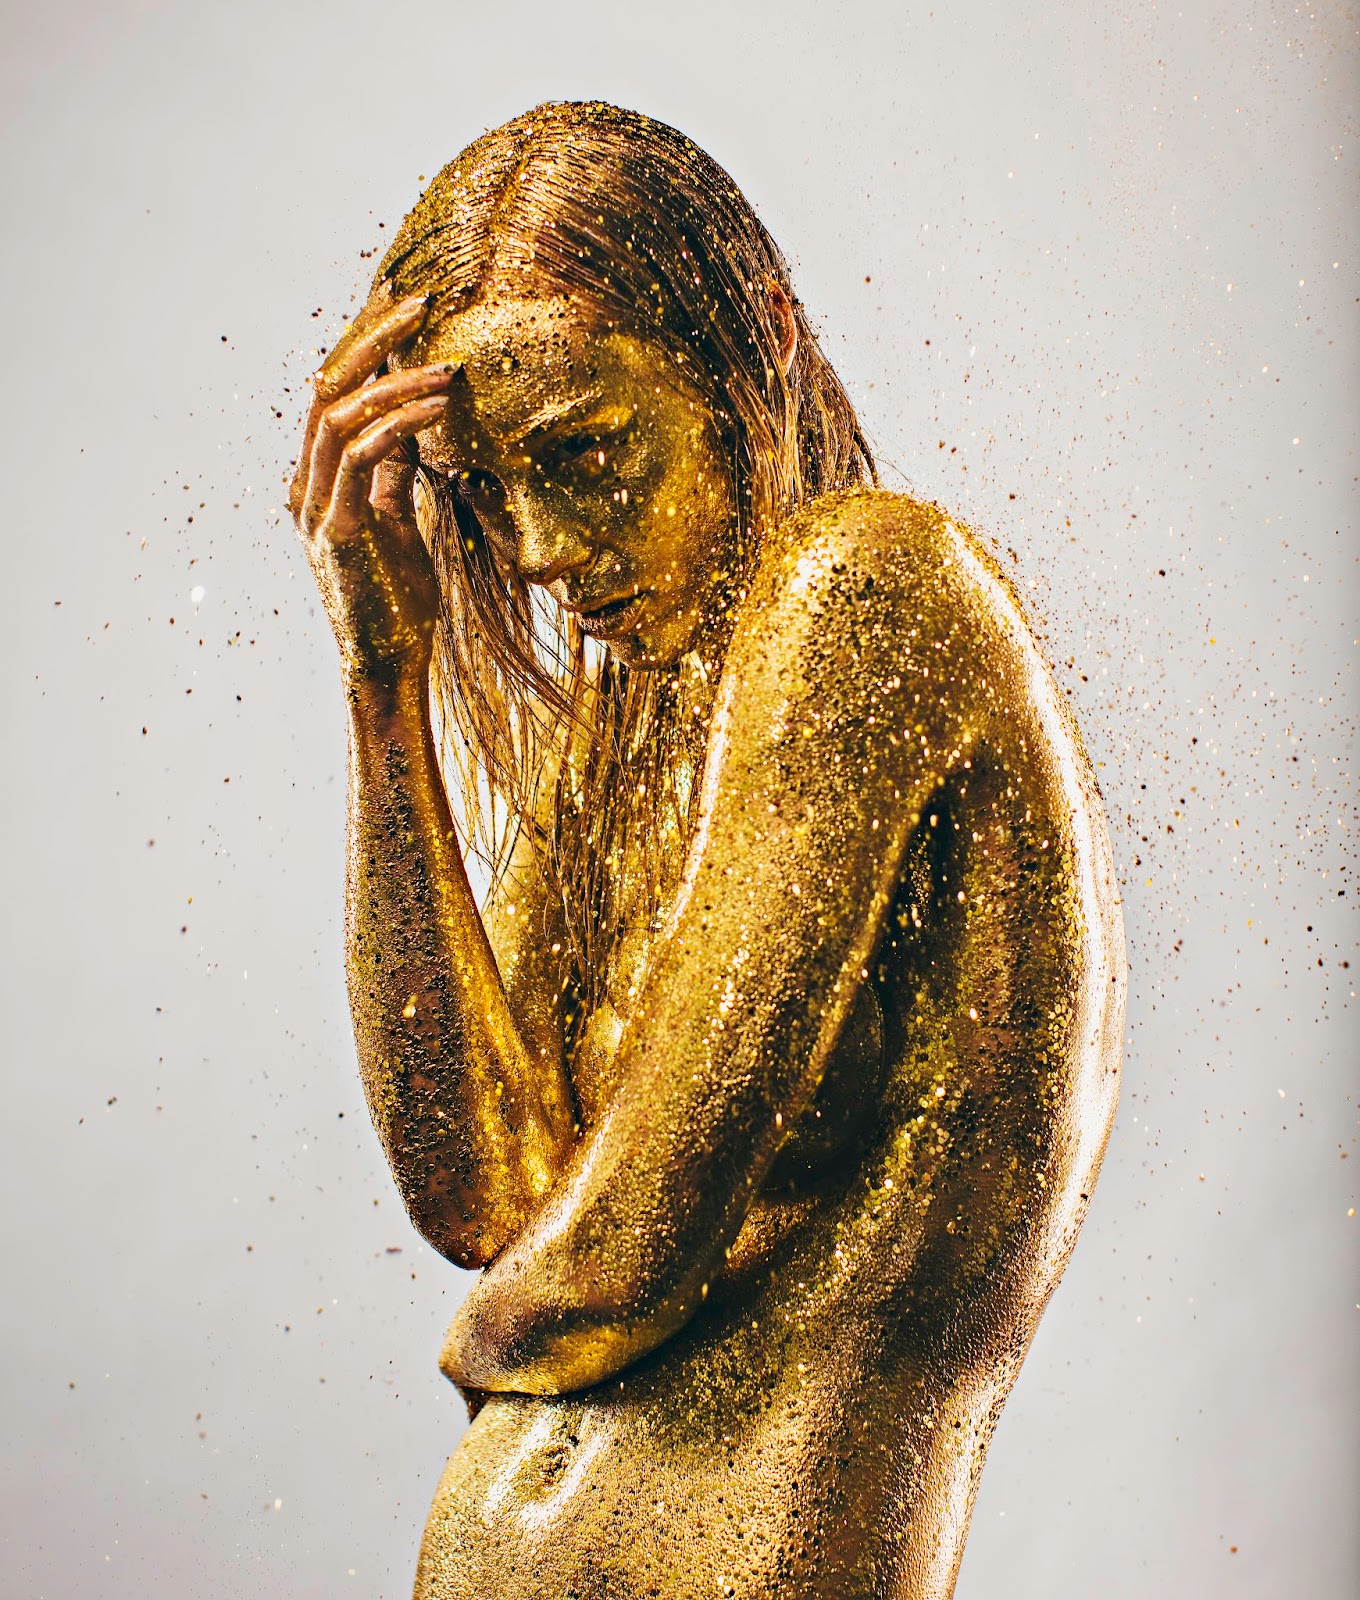
Seeing GOLD: Inside AUROUS Editorial

Hello all, 

If you follow me in Instagram you've probably seen some sneak peeks of the latest editorial I worked on: AUROUS. 


This was such an incredible shoot with an amazing team. 
Here's a behind the scenes look inside the shoot... 

The Crew
Photographer: Kyle LaMere
Model: Jessica Ann Klaas 
Hair Stylist: Gia Tummillo 
Makeup Artist: Jen Brown
Makeup Assistant: Yvonne Wallace

Inspiration Strikes


The whole shoot came about because I worked on a job with our model Jessica. She and I discussed how we need to do more creative shoots and that we'd love to work together again. 

Through the power of social media, I'd posted a behind the scenes photo of Jessica and I on my facebook page. Lucky for us, Kyle LaMere saw this and commented immediately, showing much interest in doing a collaboration. We've both independently worked with Kyle before, so we decided to come up with a shoot for all 3 of us to work on!

Fast Forward

Jessica proposed a gold inspired shoot. She mentioned she really wanted to play around with Gold Leaf. From there I pulled some inspiration photos with ideas of things I'd liked-- some included gold leaf, but I was more interested in playing with liquid gold and different textures.

Dinner Date

The 3 of us met for dinner with photos and ideas. Kyle discussed lighting he wanted to try while I talked about the materials and ideas I had for makeup/hair. Jessica was on board with everything! 

Help! 

Last minute, I decided (with the encouragement of fellow artist Nika :)) that I needed help with this shoot. Especially since we'd be on a time crunch-- Kyle had somewhere to be by 6pm, so we had a limited shoot schedule. 
So I enlisted the help of a talented hair stylist and asked around for an assistant artist to help with clean up and body painting. 
What a life saver! 
Having these two gals on board was so helpful and extra inspiring! Having two more creatives there to propose ideas and get their thoughts was incredibly helpful and really pushed the shoot from being good to great. 

Shopping

Now sadly I don't just own gold paint and glitter (But I do now :)), so I had to hit the craft store for some glitter and Kryolan for some gold makeup! It was so fun!


SHOOT

We started our shoot day at Noon. We had 6 hours to get 4 very dramatic looks down. 


Gia concentrating hard on those waves...


The Finished Product: 

AUROUS


Thank you to a beautiful team!


Monday, June 6, 2016

Organic Skincare

Hello beauties,

Recently I made a switch in my skincare routine and I felt I should share because honestly, I couldn't be happier! 

My skin looks and feels awesome. 

And(!)
I don't feel like I'm pumping a bunch of chemicals into my system. After all, your skin is the largest organ and does indeed soak up everything you put on it (and in it :))! 

I've been very lucky when it comes to skin- I've never had any major issues-- just dryness and the occasional pimple. Of course now, as I enter my 30's I'm noticing how much less my skin bounces back! And how lines and spots are starting to show... 

I was not great about sun protection as a teenager. I didn't really implement SPF in my daily routine until my mid twenties. So I have plenty of sun damage coming my way I'm sure! 

As a makeup artist, I don't wear much makeup. Obviously, I love makeup-- as an art form, self expression, and of course to make myself feel a little more special. 

While makeup is incredibly powerful, I find skincare to be much more powerful. Being proud and accepting of who you are and all your characteristics as an individual is much more interesting and beautiful (to me at least!). 

I hope to contribute to the revolutionary thought that we shouldn't be ashamed of anything short of "perfect" because let's be honest-- that's a small percentage of people. 

And please know that people with money can afford regular facials, lasers, procedures, etc. So while you look at celebrities that "haven't had plastic surgery" know that they are doing PLENTY of other things that don't count as surgery (aka Laser treatments, etc). 

While I'm not an esthetician, I've taken it upon myself to learn as much as I can about proper skincare, and I think I've settled in a good place. 

I'll have to do a post on my skincare journey from the beginning to current day (so you can learn from my mistakes!), but in the meantime, here is what I've indulged in...

Tammy Fender Organic Skincare

I stumbled upon this while googling random organic skincare lines. This popped up as one of the best, so naturally I clicked the link...

All the products are derived from organic plants/flowers. The packaging is beautiful! brown glass containers that you can recycle later (or repurpose)!

I decided to start with one of their treatment kits for a couple reasons...
1. Committing to buying a full size product without ever trying it was a bit of a gamble especially considering the price tag attached...
2. It was a great money saving way to try the whole system to find what I liked and disliked, or what worked for me and what might not.

I ordered the Anti-Aging Treatment Kit.
$165
*photo c/o tammyfender.com

The kit includes: 
Cleansing Milk
Bulgarian Rose Water
Quintessential Serum
Intensive Repair Balm
Epi-Peel
Bulgarian Lavender Body Oil

It struck my interest because I'm always looking at preventative products for aging! The more I can do now to have great skin later is worth it in my mind :)

Also, it was the lowest priced kit at $165, and was advertised to benefit dry, dehydrated, hormonally imbalanced, sun damaged and mature skin.

I am definitely more dry/dehydrated, sun damaged and hormonally imbalanced :)

I immediately started using the kit as a whole and it is lovely.

The cleansing milk is a hydrating, lightweight cleanser.
Once a week I use the Epi-Peel, which is their exfoliant. It smells amazing and is gentle enough on my skin. It really awakens your senses and brightens the skin! I've always been one to make my own exfoliants (see here), but this is pretty great!
I follow that with the Rose Water (which I've been obsessed with for years! I use Rose Water on my clients all the time :)).
If it's daytime, I'll go straight for the Intensive Repair Balm, which my skin LOVES. It's a super hydrating moisturizer, but it's still very lightweight.
Nighttime post rose water, I'll use the Quintessential Serum. It has a lovely smell and while it's mostly oils, it absorbs fairly quickly. It's a nice extra boost for the evening.

Lastly, the kit includes a Bulgarian Lavender Body Oil... holy moly. This stuff is beautiful! Post shower, I put on while my skin is still wet. Your skin is immediately soft, hydrated and the lavender scent is calming and light.

Overall, my skin is happy with this set up!
I have implemented my own things on the side... I will always do different masks! I also have started adding in a retinol a couple times a week and an SPF for the daytime.

I will absolutely stick with this line- my skin looks refreshed, and feels really good.
While the kit products are smaller sized, a little goes a long way, so hopefully I can stagger the orders so I'm not spending a ton at once!

As mentioned before, I'm willing to invest in good skincare to have great skin. Now I'm just on the hunt for the perfect Organic SPF for my face....


Monday, May 30, 2016

Foolproof Eyeliner...

Hello Lovelies...

With warmer months finally here (Hooray!), I figured I'd give you my top tips for Long lasting liner.

Tired of putting liner on and having it travel all over your eyes? 

Try these easy steps to making a foolproof, long wear liner.

RULE #1: Always seal a cream with a powder.
This is so crucial and can be applied to other areas of makeup as well (let's just keep focused for now though :)) 

Eyeliners come in an array of types.
There are Pencils, Cake Liners, Gel Liners, and of course Liquid Liners. All have their purpose for creating different looks, but all tend to travel onto your lids! Even one of my favorite waterproof go to's (Gel Liner), can move around on a client's eyes. 

Here's what you do: After applying your cream product, take an angle hair brush, dip it into a matching (or close to matching) eye shadow color. Take the brush and use the edge to go over the cream product. 
*Press and wiggle*
That's the trick. Gently press down (Gently! don't bend those bristles!), and give it a little wiggle to dispense the product in a controlled way. Take this all across the line you originally drew on. 

Voila! 

RULE #2: Use an eyeshadow primer.
On some smaller eyes, setting with a powder is just not enough! So it's important to prevent travel onto the lid or crease, to use an eyeshadow primer such as Too Faced or Urban Decay . Both of these are very good at keeping your eyeshadow on all day strong, as well as your liner.

Take a small amount of primer and evenly coat your lid--You can use your fingers, a sponge or a brush for this. 
Then you'll want to set it with ... A POWDER! Use a setting powder if you have it. Otherwise wait a moment for it to dry a bit and go for the eyeshadows. 

I suggest using these primers rather than just a foundation/concealer coating or a naked eye because they have an anti-creasing formula that creates a barrier between your skin's natural oils and the makeup products. So your eye products become smudge proof! Which is what we want! 

Give it a try the next time you go for a bold liner. 
Have fun out there,


Monday, May 16, 2016

How To: Voluminous Blow out

Hi Everyone! 

It's been a while since I've posted any sort of tutorial, so I figured it was about time to get one up here! And to make it more interesting, it's a hair tutorial! 

I am constantly fighting very fine, limp, straight hair. I thought I'd share how I get super voluminous, bouncy, shiny hair with an at home blow out! 

Here's what you need: 


Round brush, Velcro Rollers, small clips, Alligator clip, Blow Dryer with a nozzle. 

Side notes... 
Round Brush: Size of the brush depends on your hair length as well as the amount of wave/curl you want. I like a loose wave, so I'm using a medium sized brush. My hair is also pretty long. If you have shorter hair or desire a more curled look, go for a smaller brush. 

Velcro Rollers: I LOVE velcro rollers! While they may take some getting used to.. (you do not want to get tangled up in these! Ouch!), they give a big lift to limp hair. If you don't have velcro rollers, you could just roll the sections of hair by hand and place a clip. 

Products: 


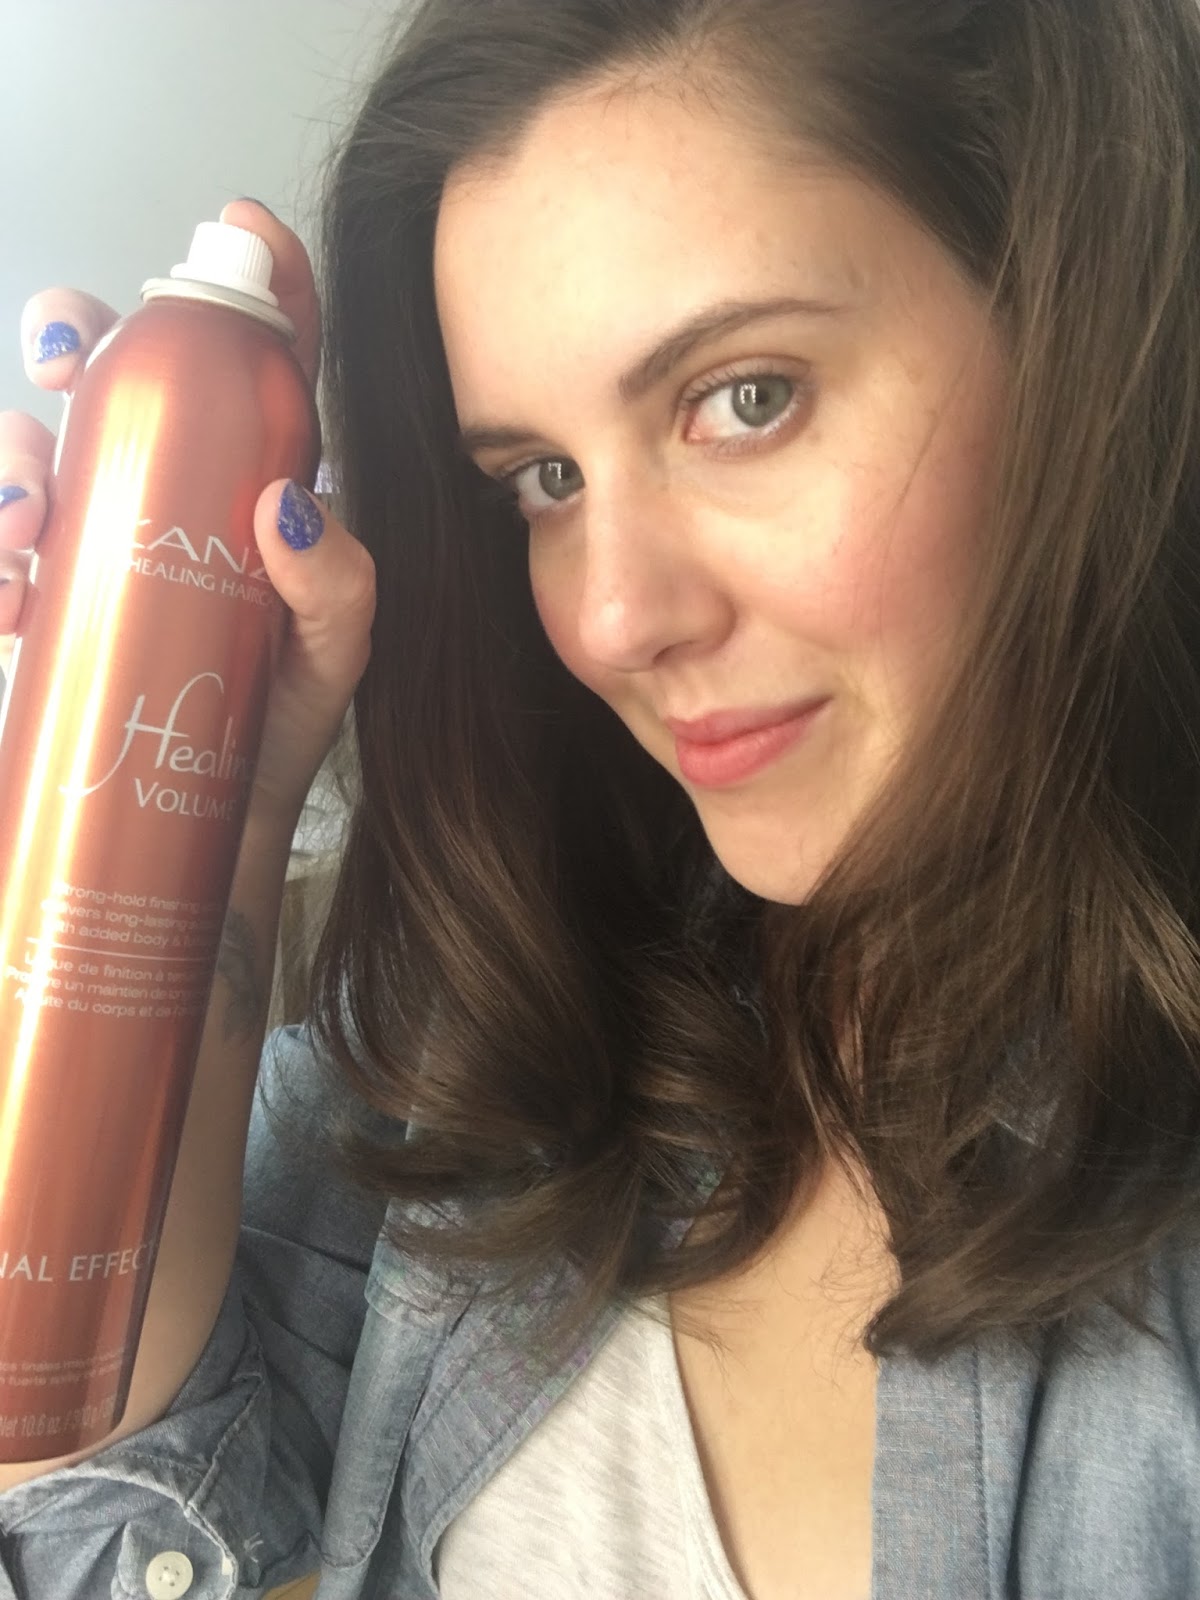
L to R: L'Anza Keratin Healing Oil Combing Cream, L'Anza Healing Volume Hair Spray, Amika Bombshell Spray Blowout. 

Side notes... 

You'll definitely need a heat protectant in your hair! 
The L'Anza Combing Cream is great because it fights frizz, protects against the heat, reduces drying time and keeps hair smooth and silky. I highly recommend this product, but if you don't have it, any sort of heat protectant cream or spray will do. 

Root Spray: I'm using the Amika and I LOVE it! But any root lifting spray or even mousse will work well. You just need a little product to help lift those roots!


Let's get started! 

The best way is to start with wet hair... 


Very sad hair :/

This is where you'll add in your heat protectant and root lifting spray. 
I'm using L'Anza's Healing Oil Combing Cream, and Amika's Bombshell Spray Blowout. 

You'll want to start with the combing cream all over your hair from the base to the ends. This will help control frizz as well as decrease the drying time. It's MAGIC! 

Then go through and hit the roots with the Amika Spray. This stuff is amazing! It gives so much volume and lift! Be sure not to spray too close to the roots, you should have at least 6 inches from the bottle to the hair. 


If your hair is super wet, you'll want to give your hair a rough dry (without the nozzle). I usually just put my head upside down and blow dry for a few minutes until it's about 60% dry. 

Now you'll apply the nozzle on the blow dryer. 

I like to section the hair to keep it out of my way while I'm blow drying. So I'll usually run my finger around the my head sectioning off the bottom part from the top. 

Clip it into place. 


Grab your round brush! 

Take a small/medium section of hair and place the brush tight against the roots, lifting the hair up. 


Take your blow dryer on the hot setting, and I usually have it on the stronger setting so it dries a little faster-- and you'll place the dryer just above the hair starting at the roots. Work the brush down the hair to the ends, following with the dryer.

Slowly roll the brush down to the ends and back up to the roots, following with the hair dryer. Once you roll back up to the roots (as pictured above), you'll blast with cool air and then gently unroll the brush and follow with a velcro roller. 
*See Video below*


Et Voila! 
Continue this process around the rest of the bottom layer. 


Unclip the top section of hair and if you need to do a second layer, do so. I usually like to leave the last section down the middle-- like a mohawk :) 


Once you get to the mohawk section, I work my way from the back of the head to the front. Following the same pattern as before. 

Hit the roots with with heat. 
Work from the roots to the ends. 
Roll the brush slowly back and forth. 
Hit with cool. 
Place velcro Roller. 


Now that your whole head is covered in rollers (or rolled sections of hair), 


 Spray a lightweight, aerosol hairspray. 


And now we wait... 


You just need to wait until the hair is completely cool. 
This is a great time to answer those emails or work on your makeup... 

Once it's cool, you can start pulling out those pesky rollers! 


It looks crazy at first... 

But trust me! 

From here you just want to run your fingers through it to get rid of any weird separation and to tame it into the shape you want. You may also need to place a new part if you lost it along the way :) 


You may want to hit it once more with some hair spray when you get it where you want it. You also have the option to tease the roots a bit for some added lift that lasts.

I opted to skip the teasing and just spritz lightly with some hairspray. 


Va Va Voom Hair! 

There you have it! 
It may seem like a lot of steps, but it's worth it. When I'm not recording the process, it takes me about 20 minutes to do. 

So give it a shot! Save that $$$ on blow dry bars and use it for a cocktail out with your bouncy new hair :) 


Monday, May 9, 2016

How to properly cover a pimple...

We've all been there... we wake up in the morning to find a massive red zit on our faces! And of course, as luck has it, it's usually on a very important day.
Wedding, a party, a date, picture day!
         
With something so common (everyone breaks out!) it's important to know how to properly take care of covering this issue. Many try to overcompensate by using LOTS of product. This is only going to attract more attention to the blemish.
More Makeup = More Staring
That's no good!     

So here are some tips for covering that baby the RIGHT way.

1. Treat it don't Pop it!

If you can, do your best to keep your paws off! The less you touch it, the better off you'll be. So if you're waking up to this, and you're on the way out, be sure to start by cleaning your hands and your skin. Then if you have a leave on treatment, apply it before makeup and after your moisturizer.
YES.
You will need to moisturize. Your skin needs to be hydrated regardless of your skin type.

2. Use as little product as possible!

One of the tricks of makeup is, Less is More.
And it's so true.
If you plan to wear a full face of makeup, start with your foundation to cover what you can. Then go in with your lightweight concealer. Take a very thin, flat concealer brush and gently dip into your concealer. I highly suggest a creamy concealer-- nothing too chalky or hard or cakey. I love Nars Radiant Creamy Concealers!

Gently, using the tip of your brush, create little X's over the pimple. Do this several times in different directions (so the X's overlap), until covered.

3. Set it!

With a very lightweight powder, take a little on a fluffy brush (an eyeshadow brush works well) and gently tap some powder on top to set the makeup. If you've done it right, it should be covered without calling attention, and if you need a little extra concealer, it shouldn't be a problem to gently tap a little extra on after powder. 

So easy! Just remember to not get frustrated, and as always, it's usually never as noticeable to others as you may think! These things are always bigger in our own eyes ;)

Another tip to help, depending on where your blemish is, try to accentuate the feature that is not close by.
For example:
 Say you have a zit on your chin. You probably don't want to wear bright red lips that day as it will...
A) accentuate any redness you may have in that area
and
B) attract others eyes to that part of your face.
So it'd be best to play up your eyes that day. Go for a winged liner or some shadows. You want to make sure your focal point is directed away from the blemish :)

Hope this helps! Be sure to keep this in mind the next time you're mid freak out when you find that annoying pimple :) You can cover it!