Tuesday, January 29, 2013

Purple Eyes

Winter is dark and dull-- so I like to brighten things up a bit with my makeup. It makes me feel so much better! 
One of the easiest ways to brighten up is to incorporate a fun color! Of course, lipstick is my go to, but sometimes it's nice to play up the eyes. So here is  little guide on purple eye makeup. I will say, no matter what color your eyes, purple seems to work!

So here are some violet eyes with a very quick how to.
*My camera's battery was dead so I had to use the IPad for these! Better quality coming soon! Still figuring this out :) 

I started off with Urban Decay's eye shadow primer in Sin for an all over shimmer.


I then followed it up with a very soft lilac across the lid.


Here I am applying a line of MAC's Macroviolet gel liner on my top lash line. 


I followed that with lining the bottom inner rim with the same purple gel liner. 


Next, I took the two darkest shades of purple on an angle hair brush and traced over the liner on the top lash line. 


You can see that I've extended it out beyond my natural eye, giving a slight cat eye effect. 


I then coated the sides of the angle hair brush with the same dark shades, and smudged the shadow in an upwards motion- thus creating a "smokey" effect. 


This is how it looks. 
(don't mind my crazy face!) 


 I then took a fluffy brush and buffed the dark purples into the crease and created a softer look.


 I then took the same dark purples and smudged a little under my eyes- and then took a brighter hue of purple and smudged a little of that on top for a little more dimension. 


Then, to add a little more OOMPH! I lined the upper, inner rim with black. This is not necessary, but I think it adds a little more dimension and interest. Not to mention, it makes your lashes look fuller! 


 Layer on some mascara.... 


 Here's the final look! 
I topped it off with a soft pink lip and gently filled the brows.  


Quick snapshot and list of the products used for the eyes: 

1. Eve Pearl Velvet Eyes Palette
2. MAC's Fluidline gel liner in Macroviolet and Blacktrack
3. Maybelline Full 'N Soft Mascara
4. Urban Decay eye shadow primer in SIN
Brushes: 
*from left to right
MAC #263 Angle Hair Brush
MAC #210 Precise Eye liner brush
MAC #217 Blending Brush
MAC #219 Pencil Brush

Hope you enjoyed this! 

Go play with a new color palette just for fun :)

Wondering what colors to try? Here's a quick guide with a little help from the Color Wheel: 


While looking at the color wheel it's easy to find colors that work well together. 
One simple way is to look directly across from the color you're trying to make stand out-- that is a complimentary color. 
Another easy way is to look to the right and left of the color you're trying to make stand out-- also known as it's analogous colors. 

Bright Colors to Try....
Have blue eyes? Try Yellow/oranges, green, purple or yes-- BLUE!
Brown eyes? Try violet, blue, and greens.
Green Eyes? Purples, Pinks, teals/blues. 
Hazel Eyes: All of the above!

What it really comes down to is, if you apply color in the right way, you can make just about anything work!  

Have fun!! 
xoxo JEN


Monday, January 21, 2013

Nora's Makeover

Hello friends--

I'm gonna take us back a few weeks, to New Years Eve!

On NYE I had a very light work day. 
That said, I put out a text to a few lady friends as I was feeling festive and inspired from my one client earlier that day! 

My good friend Nora immediately jumped on board. She of course brought some pink champagne with rock candy lollipops for an exceptionally fabulous glass of bubbly-- 


and we made her up!

Here is the lovely Nora:

Let me just start by saying that Nora is just stunning without makeup! She has a beautiful face with gorgeous features (umm, how can you not notice those peepers?!), and an even more beautiful heart. She is incredibly real, fun(ny), smart, giving and thoughtful. I am truly grateful to have her in my life.

She is also quite a talent! While she won't own up to it, she is an incredible photographer and has a knack for styling. 
You can check out her blog HERE!

On to the makeup!
The Look
Before and After

Nora takes incredibly good care of herself. 
Seriously. 
I could learn from her. 

Her skin is practically flawless-- a blemish or two-- but overall her skin felt hydrated, supple and was pretty much even in tone. Making my job incredibly easy! 

Whenever I see Nora she usually has a pretty laid back makeup look-- she generally keeps it simple. On occasion I've seen her play up her eyes bit. 
She gave me complete freedom to do what I wanted-- and while I wanted to do something fun for the evening, I also didn't want to stray too far from her personal comfort zone. 

I've played that game before...
X "you can do whatever you want!"
ME "Really? great!"
X "oh, I like it but... "
Sidenote--
While having creative freedom is FABULOUS-- what's even more fabulous is being honest about what you want/like/dislike, so I can do my job :) Don't be shy to tell your artist what you want! 

Back to the look--
Here's what we did...

Skin Prep:
I applied a small amount of an intense moisturizer to her skin. Nora favors to the dry side, and while she felt pretty hydrated, I wanted to make sure her skin felt dewey (as described in my post about skin prep, HERE)
From there, I prepped her lips with a balm and applied an eye primer from the lash line to the brow. I used Urban Decay's in SIN, which is a champagne shimmer. 
Eyes:
I started out by using MAC's Deep Damsen (a beautiful dark maroon) Matte eyeshadow from her lash line to just below her natural crease. I packed it on with a flat shadow brush. From there, I took a blending brush and softly blended the color into her crease.

I then took MAC's soft shimmer tones Shroom and Naked lunch, and applied them on the inner corner of the eyes.

From there, I took MAC's eye liner in Smolder and applied it on the inner rims of her eyes (both upper and lower lash lines).

I then took a black gel liner with a thin pointed brush and lined the top of her eye-- extremely thin on the inner corner and getting thicker as I move towards the outer corner.

I go over this liner with an angle hair brush coated in MAC's carbon eyeshadow, softly blending the black shadow up into the crease.
Buff the black shadow and the original maroon shadow gently in the crease.

Next, I took Makeup Forever's Flash Palette (which I LOVE!), and took a little of the gold on my finger tip and placed it on the center of her lids.

I added a nice coat of mascara--
Nora has CRAZY amazing lashes so I didn't feel the need to apply falsies. Not to mention-- for NYE she was keeping it low key-- headed to a small gathering with close friends. If she was going to a concert, or a venue with dark lighting-- I would have added them :)

That's pretty much it for the eyes! 

For the rest of her face, I actually airbrushed her. She hadn't experienced the airbrush foundation before, so I figured, why not :)

That said, I cleaned up any fall out and mess from the eyes (that's why I do eyes first :)), re-hydrated where necessary, and then primed her skin.

From there I used concealer to cover what little discoloration she had. Pretty standard places (under eyes, around the nose, chin).
I then took a very dark brown concealer and used it to contour her face. Contouring adds some dimension and helps to enhance features. I did this on her cheekbones, the nose, and around the forehead.

Then I airbrushed the foundation.

I gently filled her brows with a powder.

Set her foundation with a light dusting of Makeup Forever's HD powder.

Applied a soft pink/peachy blush, a soft pink lip liner and some gloss, and she was good to go!!


Yay for Nora letting me post these photos!!

Hope you enjoyed the look!

XOXO JEN

Wednesday, January 16, 2013

Proper Skin Prep

I always tell my clients, Good makeup starts with Good skincare.
Seen in one of my first blog posts HERE

It's true! 

If you neglect your skin or don't properly prep the skin, applying makeup can be extremely difficult and sometimes almost impossible!

Before I put any makeup on my client's face, I make sure their skin is prepped.
Why is this important? 
It assures a smoother makeup application, long lasting makeup, and an all over better looking application.

So while you're taking care of your body and skin, be sure to follow these tips on how to prep your skin for makeup :) 

Here's how I prepare the skin for all my clients, listing some favorite products along the way.

Step One: Moisturize
I think I've written that word 600 X's on this blog! It is so important to make sure the skin is properly hydrated before applying makeup. I actually make sure to moisturize the face until it feels dewy/moist.
  YES! 
No matter if you're oily, or dry, I make sure the client's skin feels moist to the touch.
Here are a couple moisturizers I favor: 
For oily skin clients: 
Mario Badescu Oil Free moisturizer
Retails at $20
(You can purchase it HERE)
I enjoy using this Mario Badescu Oil Free moisturizer. This line is incredibly affordable and has products for EVERY need! You can even fill out a skin survey HERE to try some new products. Plus, they give away samples with every purchase :)

For Dry Skin client's (or combination with dry patches):
Embryolisse Lait-Creme Concentre
Retails at $16-$28
(You can purchase it HERE)

I love this Embryolisse moisturizer. It is incredibly hydrating and a little bit goes a long way.

*Additional tip:
 I usually do the eye makeup first-- so after I hydrate the skin, I'll do the eye makeup, and then re-access the skin-- so I'll gently feel the skin and if there is still some dryness (if the skin is really dry in some areas, it can absorb into the skin quickly), I'll re-apply some moisturizer where needed and then finish the face prep. *

Step Two: Lip Balm
Your lips need love too! Be sure to apply a hydrating balm onto the lips so that when you go to apply a lipstick/gloss, it is a smooth application. If you have chapped lips, be sure to take a little sugar and a warm washcloth and gently rub off the dead skin. Then follow with balm/chapstick.

One of my favorite balms is the Rosebud Salve.
Retails at around $6
*You can get it in it's original cute tin, or they now make tubes!*
(You can purchase it HERE)
This has been around forever and is a favorite amongst artists and makeup mavens :) Not to mention, it is multifunctional! It can be used for your dry feet and elbows :)

Step Three: Eye Primer
I will almost always use an eye primer. Its purpose is to even out the tone on your lid, create a solid base for the eye shadow for even color, and to prevent product from creasing.
It is GREAT.
A little goes a long way, so take a tiny dab and apply a thin layer evenly on your lid with your finger, a brush or a sponge.

Here are a couple favorites that work remarkably well!

Urban Decay Shadow Primer Potion
Retails at $20
*also comes in a variety of shades! I love the understated shimmer I get with SIN!*
(You can purchase it HERE)


Too Faced Shadow Insurance
Retails at $18
(You can purchase it HERE)


Step Four: Primer
I apply a primer after I've done the first 3 steps and have done the eye makeup. If the face is no longer dewy and moist, after the eye makeup is finished, I'll apply some more moisturizer where needed and then apply the primer.

A primer is used to create an even base for makeup. It is generally silicone based, which helps makeup adhere and prevent it from moving around too much. It also helps the products to wear all day long! I like using primers (especially for a full face makeup application) because it kind of creates a barrier between your skin and the makeup.
You can apply this with your fingers, a sponge, or a brush.

Some primers I love: 
Smashbox photo Finish primer.
Retails from $17-$49
(You can purchase it HERE)


This is a great universal primer for any skin type. Smashbox has a collection of different types for different purposes-- all of which are great! For example, they have some for color correction (redness, blue undertones), hydrating, and even one with an SPF!

Laura gellar makeup spackle:
Retails at $27
(You can purchase it HERE)


I feel like this primer is very hydrating- It works on all skin types, but if someone is extremely dry-or if I'm doing makeup on more mature skin, I'll use this.

Extra Step: If you want, I also highly suggest using a light eye cream. There is little/no oil production underneath your eyes, so applying a product that is gentle, moisturizing and firming around the eyes, is great!
If you experience excessive dryness around the eyes, I highly suggest this step! It will make any makeup around your eyes (foundation/concealer) look better and prevent it from sinking into fine lines.
Here are two good ones:
Burt's Bee's is a STEAL!
Retailing at $18
(You can purchase it HERE)
Dermacyte is a major SPLURGE!
Retailing at $95!
(You can purchase it HERE)
So remember! Before you apply a full face of makeup on a dry face-- think back to this post and AT LEAST apply a good moisturizer :)


Check out my TV appearance with WCIU's "You & Me This Morning"-- talking about the golden globes, and some makeup tips every woman should know-- INCLUDING skin prep! xo


Friday, January 4, 2013

Surviving a Sunless Winter

Cold, dark winter days definitely bring me down. 

When I was a senior in High School, (and honestly didn't know any better!), I'd go tanning to get a boost of Vitamin D and some color. 
*This phase only lasted a year! Thank goodness!

Shortly after, I learned about the effects and damage this has on your skin! Not to mention the risk of Melanoma. 

Now trust me, I know tanning can be addictive, but please save yourself and STOP! 

You will be so happy in the long term. Sun damage causes wrinkles, dark spots, and can make your skin have a leathery feel, which is not so cute! 
(And incredibly difficult to make up!)

Here are some tips to help you... 

Surviving A Sunless Winter

1. Spend at least 10-25 minutes a day outside or by a window. 
Thank goodness, my apartment gets a lot of natural light! Because of that, I can blog happily by my bright window :) If you don't get much light in your place, I suggest taking a walk. Yes, go outside! Not to mention the fresh air will do you good :) 

This is great for you because during this time of year, many of us fall into hibernation mode. I know I do! Our bodies crave that vitamin D that we were once receiving so much of over the summer. As a result, we sleep more, eat more, and sometimes feel depressed!
 Just make it a habit to get some natural sunlight once a day. It makes all the difference. 

2. Sunless tanner.
Yes, there are many great sunless tanners available now! So don't be afraid! Instead of subjecting your skin to harsh ultraviolet rays, you can slather on a tanning product that can last anywhere from a day to a week. 
Here are some great options: 
Tan Towel-
These have a natural look to them and are gentle even for the face! I use them often as they are clean, efficient and easy to use. 

Jergens Tanning Lotion-
Replace your regular body lotion with this product! Using this daily makes for a gradual, natural looking tan.

Airbrush Tanning-
There are so many places that offer this service- and I know that some makeup artists offer this as well! It is similar to airbrush makeup, but on a larger scale. The artist airbrushes a tan on your body. This "tan" can last anywhere from 5-7 days! It is incredibly natural looking, even for the palest of clients :)

I hope this helps you tanning fans out there! Try some of these self tanners (amongst so many others!), and I guarantee it'll make you feel just as beautiful. 

Not to mention,  pale, porcelain skin is an understated beauty. Learn to embrace it! Everyone wants what they don't have! 

And remember, in the warmer months, be sure to cover up with a big hat, sunscreen and a nice pair of shades! 
xoxo Jen

Wednesday, January 2, 2013

So Long 2012, hello 2013

As a little send off to 2012, I figured I'd spend this first week of the new year looking back at all the amazing opportunities and projects I've had the pleasure of working! 

So here's a quick countdown of some of the most exciting things in my career for the year! 
(and some of my favorites :))

5. Photo spreads and Ads.
I absolutely LOVE print work! I did more work with Time Out Chicago this year than the previous 3 years, including 2 different fashion spreads! I absolutely adore the people at Time Out and love working with them. Here are just a few of the shoots we worked on this year...

 *Photo by Liz Jochum 
 *Photo by Dave Rentauskas
*Photo by Lisa Predko

 Aside from Time Out, I've managed to get a full page ad with FACTOR in Today's Chicago Woman. It was a gorgeous photo shot by Bryan Whitely and I was thrilled for it to be seen publicly :) 

*Photo by Bryan Whitely

Another ad campaign I worked on was with Jorge Gera Photography for @Properties ads. They can be found in CS, NS and other modern luxury publications.

*Photo by Jorge Gera

4. Built a website: and web following
I spent most of the beginning of the year building a new website from scratch. It is SO much work, but it was so worth it. Getting it to be the exact way I wanted, and updated as often as I wanted, was a dream! Check it out here-
I've also worked really hard at creating an online community for my business. I can now be found on 
and of course, Blogger :) 

3. Networking/Meeting artists:
This year has been phenomenal in terms of meeting artists (some very new and some who've been in the industry for years!). It has been so inspiring and fun and just delightful to get to know these talented artists. I think it's extremely important to have a good community in your industry. It's important to know people reliable and talented enough to pass work onto. It's also great to have a group of people that understand your industry and are open to sharing their learning experiences. I couldn't be more grateful for some of the talents I've come across this year :) 

2. Celebrities in Chicago...
I was fortunate enough to do makeup for these two talented actors, Jimmy Smits and John Ortiz,  for the cover of Where Chicago magazine (released this week!)


The two of them are currently in a production at Steppenwolf Theater here in Chicago. Check it out!

I also had the pleasure of working on the beautiful Monica Raymund, of the TV show Chicago Fire. Bryan Whitely shot the photos, and while I can't share the photos at this time, hopefully they'll be released soon! xo

1. Filming in Ireland
YES! 
You read right! I was blown away at the offer to take an all expense paid trip to Ireland to film two local shows. I did the hair and makeup for two beautiful hosts who happen to be sisters. It was an incredible experience that I will hold close forever!

I was gone for a week. The days were tough- Of course, makeup and talent were the first people up at 6am to do hair and makeup. Things are different overseas, they are slower paced and more relaxed, so the kitchens in all the hotels we stayed at weren't open that early! Thank goodness we had coffee in the room! 

Days were long, and stressful. We shot a lot of footage for both shows, but after a long day of shooting, the crew made sure to enjoy a nice dinner together each night. It was so fun, exciting and beautiful. The people were amazing and the towns we visited were stunning! 

I can't share too much (photo wise), but here are a few to show how gorgeous my scenery was!

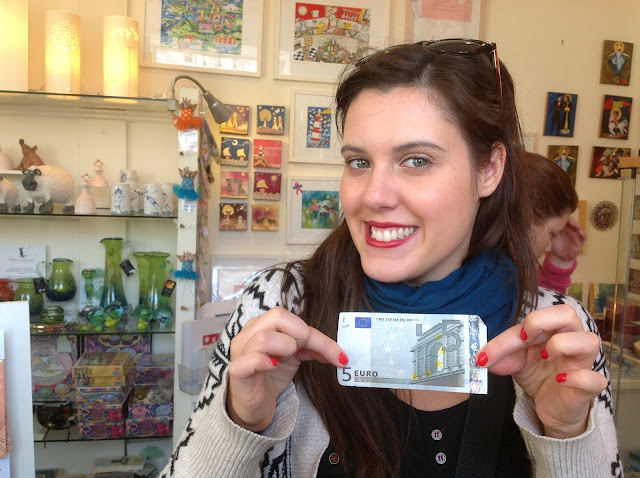
 Shooting in a cute art shop, this is me ready to spend some money :)
 Schaemus, our driver for the week, and the mother and daughter who lived on this farm we visited!


 Me on the greenway, staying warm :)

 Entrance to ....
 We had the pleasure of staying a night at Ashford Castle!

 A little blurry, but a picture of me with some of the crew members for our fancy dinner at the castle :)


Working on the BEST SET EVERRRRR! *excuse Michelle's thumb in the corner :)


Me enjoying a tea break in the castle with my new Irish sweater.

I'll post the show dates for these shows as soon as I hear! I do believe it will be in March :)

What a whirlwind!

So long 2012, you were a good year for me! I can only hope that 2013 will bring more work, fun, travel, and beautiful images. 

Thanks for making my 2012 amazing! I couldn't do this without the support of my followers and friends- so THANK YOU! 

XOXO JEN