Thank you for your patience-- this month has been insane work wise, so I've neglected a weekend or two of blogging...
But to get back on track I thought it'd be fun to share my new purchase and review with you!
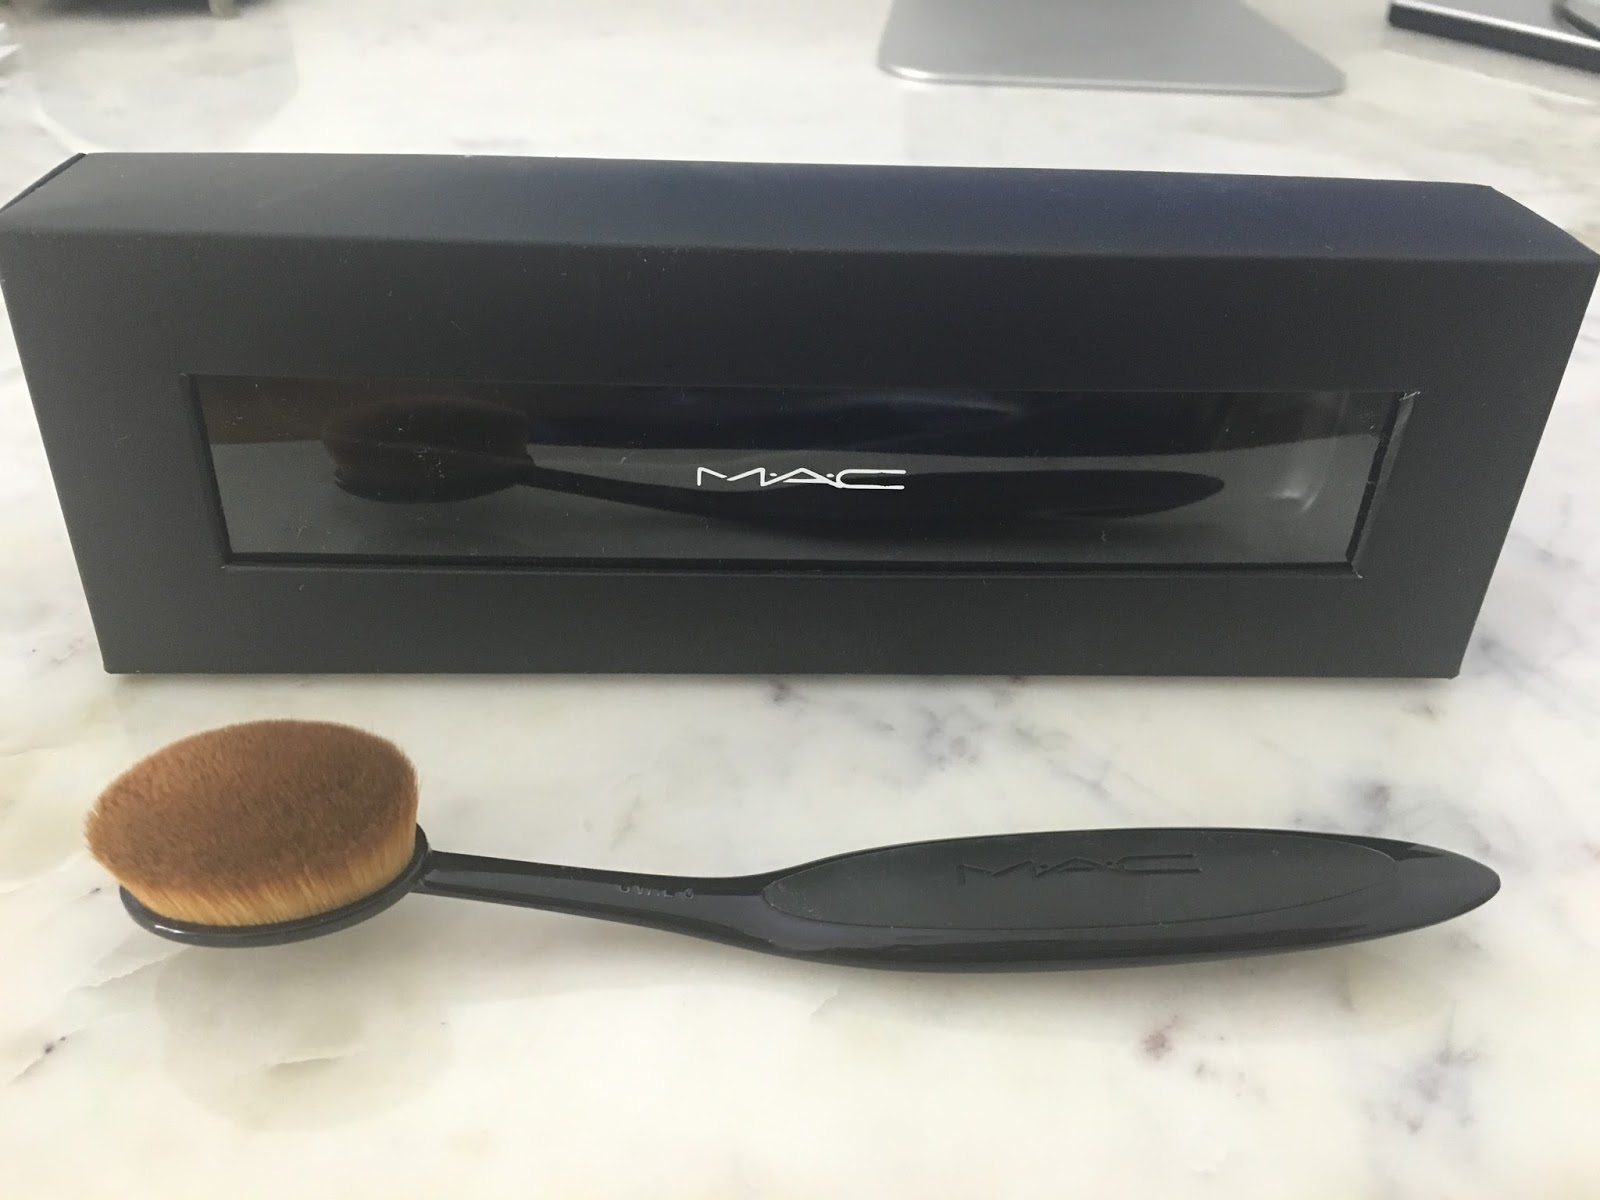
Here it is...
This is not a scam! lol
I have had my eyes on the original brushes by Artis for some time. I kept going back and forth about purchasing them because A) I truly thought they were a weird fad B) I didn't want to re-learn how to use brushes... C) I just wasn't sure if it would be worth the price tag.
But alas, here's what happened...
I wandered into the MAC store to pick up an item or two and saw the brush out on display. I asked the sales associate if I could try it out. She gave me a bit of concealer and I dipped the brush in and started buffing it into the skin.
Holy moly. The bristles are SO soft!
They feel amazing against the skin and it really does give a nice finish to the foundation/concealer. I couldn't believe how much I actually liked this brush! And I couldn't believe I was going to purchase it without an artist discount (it's one of their special products that doesn't apply for pro discount= lame). But I really liked the way it felt on my skin, so I purchased the largest one they had for myself to try it out for a while.
They have 3 sizes, a small liner brush, a small shadow/concealer brush and the larger foundation brush. The Artis Brushes have a wider range of sizes, including much larger ones and different shaped smaller ones.
While I do think the smaller ones are a "fad" and won't really get much traction, I do think the larger ones are quite nice!
Part of the reason I like it so much is because I can use it for a lot of different things. Moisturizer, foundation, concealer, cream blush, highlighter, you name it! I can buff it on! The size is quite nice (it's probably a size 4 or 6 in Artis), it can work for full face stuff, but it can also fit under my eyes and around my nose for extra coverage/concealing.
It gives a seamless finish, almost like airbrush. No brush strokes or fingerprints to worry about.
It's got a sturdy handle that's comfortable and easy to use.
I don't think I'll be purchasing the smaller detail brushes for eyes/liner, etc. But I am really enjoying this larger face brush and might purchase one or two for my kit!
I hadn't heard of this brand until one of the brand marketers sat in my makeup chair. She raved about the products and how they are all she uses now. She also gave me a brief history about the baby company! After our appointment, she kindly asked for my address to send over some product, and let me tell you.. she sent me some PRODUCT!
She sent me a giant box of pretty much every product they carry! This happened back in May I believe, but it's taken quite a bit of time for me to finally get through the majority of their products!
And I have to admit, they are quite nice. Here are a few that I now can't live without...
Feel the Moment:
Anti-Aging Ultra hydrating sensory Awakening Primer Serum
I have quickly fallen in love with this stuff. It's like magic! A beautiful lightweight serum that absorbs into your skin-- I love to use this as a primer, especially on dehydrated skin. Sometimes I'll just tap it on to dry patches or under the eyes if it's a little dry. It helps your makeup to glide on seamlessly, and it feels amazing.
CC+ Veil Beauty Fluid Foundation with SPF 50
I am not a big foundation wearer. I generally spot conceal where needed and move along! But after trying this beautiful foundation, I am sold. It is incredibly light, sheer, and yet has great coverage! I love the way it feels on my skin. The best way to apply this is using one of IT Cosmetics' signature brushes...
Dual Airbrush Foundation Concealer Brush
This is my weapon of choice! All of IT Cosmetics' brushes have received rave reviews from beauty experts and celebs, but this one is so handy! I tap the large foundation brush into the CC+Veil foundation and gently buff it onto my skin. It is a flawless application. After foundation, just flip the brush and use the concealer end to softly buff away any additional imperfections.
No Tug Waterproof Gel Eyeliner
all images C/O ITCosmetics.com
I can't stop using these pencils! They glide on so easily-preventing any discomfort or pulling. The color is phenomenal, and the best part is-- they do not move! This waterproof, no travel pencil is perfect for a full day wear, and great for events. And, they come in a variety of fun colors!
There are many more that I'm enjoying and still so much more to try! Be sure to check out their website for a history about the company, product reviews and shopping! You can currently order their products on QVC, online and at Ulta stores.
Have fun trying out these fab products, and let me know your thoughts about some of the other ones I haven't yet tried!
As many of you know, The Makeup Show came to Chicago this past weekend.
What does that mean? It means all the artists in the area go a little shop crazy, drink lots of bubbles and network!
Trade show madness!
This year was only two days (Saturday and Sunday), as opposed to last years 3 day stay (Sat-Mon), so for a lot of freelance artists it was a little tough to get some shopping in as weekends can be busy!
I did have a wedding on Saturday, but finished early enough to swing by the show afterwards. I made sure to make a game plan and shopping list before leaving the house...
I ran into some local artists who I love that were working the show that day including, Martina Sykes, Jamie Dahms, Bek Lieto and Crystal Portillo -- All of who were working with Matt and Paul over at the Frends Booth.
Nicole created a lot of beautiful looks throughout the show- you can see more of them on her instagram HERE.
I have to say, I really love The Makeup Light. I spent a lot of time at their booth chatting with the creator/owner Michael Astalos. His wife is actually a makeup artist, which makes sense considering how well thought out this product is. It prepares you for any situation you may run into as a freelancer. Not to mention, the quality of light is beautiful, and I totally bought one :) I'll be expecting mine to show up sometime next week! I'll be sure to write a follow up post after using it a few times ;) You can obviously find their products at any upcoming Makeup Show, but you can also find where to purchase through their website HERE. After stalking The Makeup Light booth, I had the pleasure of meeting artists, seeing beautiful body paintings, and of course, picking up the last few things on my list.
Mega talented Orlando and Matt repping the Frends Booth! --------------------------------------------------------------------------------- One very special moment that I failed to document while at the show, was meeting the ultra talented, Eugenia Weston. Eugenia is an incredible makeup artist and also the owner of Senna Cosmetics. She saw that I was working Sunday's show at the NARS booth (behold the power of social media), and took the time to swing by our booth, ask for me, and introduce herself. I was so floored by this gesture, that I didn't think to take a photo-- But this definitely made my Sunday :) --------------------------------------------------------------------------------- After making my rounds, here is my collection... A bit modest compared to most :)
Believe it or not, that is not everything on my list! I was hoping to get some time to shop on Sunday since I was a little overwhelmed on Saturday-- I also wanted to check inventory and set a budget.
I was working with NARS on Sunday, and the Booth was SO busy, that I didn't have any time to pick up the final Items I wanted to get, which included..
Luckily, all these items are available online and all offer discounts. I'm bummed I missed the show prices, but you can't win 'em all! Next year I won't hesitate on the products I know I love (such as the Senna blush palette, which sold out!), so I can be sure to get the best products at the best deals!
Overall, it was a great show weekend! It was so fun and inspiring to be surrounded by all that talent. I had a great time chatting and catching up with fellow local artists who I never get to see, both at the show and at the Chicago Beauty Exchange's Beauty Mash Up Event!
We wanted to host an event around The Makeup Show, to introduce local artists to some of the national trade show artists and vendors.
Here are some snapshots from the event..
The bar at Quay Lounge
Getting things started
Jen Brown and Traci Fine
Nina Ottolino and Kristen Pulice
Mel Wilson and Matt Morelli
Juan Jose, Jordana, and Jen Brown
Sam and Emily
Oluwaseyi, Natali, Erica and Evelyn
The crowd!
Nika Vaughan and Mel Wilson
We had an incredible event! Thank you to all the artists who stopped by even after working the show all day! Thank you to The Powder Group for making an appearance as well! We had a great time and hope to host another event like this for next year's show!
Last night I watched the Oscars with anticipation and hope of some breathtaking looks and trends. What did I expect?
Looking back at Fashion Week this year we saw a lot of Color! (which you can read about HERE.)
So of course I was expecting some bold lips or washes of color on the eye--Graphic liner was huge at Fashion week as well, so I was really expecting to see some exciting looks walking down the red carpet.
Overall?
I was underwhelmed!
I felt like everyone played it super conservative and safe. Mind you, most everyone looked great, but it was boring! No one really stepped out and WOW'd me.
Wanna know some of my favorite looks of the evening?
Watch me on WCIU's You & Me This Morning as I talk about some of my favorite looks of the evening:
The leading trend of the evening was definitely a clean/fresh natural face with some emphasis on the eyes.
In honor of last night's hottest trend, I showed up to the station rocking out that look!
So here is a sneak peek at how to get the look:
Here is a close up of the makeup look
Eye Detail...
A little blurry, but you get the idea :)
Products used:
1. MAC cosmetics Eye shadows-- Names of colors listed below--
2. L'Oreal Voluminous Mascara in Blackest black
3. Ardell #120 Demi Wispies
4. Laura Geller Makeup Spackle Primer
5. Makeup Forever Face and Body Foundation #20
6. Tarte Cosmetics Cheek stain in Vivid
7. Makeup Forever HD Powder
8. MAC Strobe Cream
9. Makeup Forever Aqua Lip #1C
10. MAC Lipglass in Nymphette (top) and Lust. *Product sources below*
My Concealer Palette-- I used #1 to highlight, #2 for extra coverage, #3 for contouring and I also used the concealer to the left of #2 for my under eyes. It's Eve Pearl's Salmon Concealer in Medium :)
MAC Shadow Colors used for this look.
Tools used for this look:
1. Eve Pearl Foundation Brush
2. Crown Brush Concealer Brush
3. Beauty Blender
4. Crown Brush: PP9 Oval Foundation brush
5. Crown Brush: C330 Blending Crease
6. MAC #217
7. Crown Brush-- Don't remember the #!
8. Crown Pointed Lip Brush
9. Trucco Eye brow brush
Step by Step Instruction
First thing's first, always hydrate! Moisturize that skin!
EYES: I always do eyes first-- I feel it makes for a cleaner application.
That said, I did prep the eyes with Too Faced Shadow Insurance Primer (not pictured). Over that I packed on Vanilla with the #5 brush all over the lid up to the brow.
From there, I took the #6 brush and lightly placed Naked Lunch and Shroom on the inner tear ducts of the eye, across the lid and then packed it on the brow bone.
I then took the #7 brush with Mulch eye shadow, and place it on the outer corner of the eye. I create a "V" with this darker tone. From there I take my #6 brush again and use it to gently buff out and soften the mulch.
Taking the same brush, I dipped it into the Cork shadow and placed it within the "V" shape I created with the mulch, and extended it across the crease.
Buff until you reach the desired finish.
I was pulling inspiration from Charlize Theron's Oscar look last night:
She has a super clean face, with some soft neutrals on her eyes, and loads of lashes!
That was my goal.
So, I skipped the liner :)
I curled my lashes and applied a coat of mascara. From there I applied the Ardell Demi Wispies(I'd trimmed them down and cut them to fit my eye), using DUO adhesive in clear.
FACE: I applied my primer, followed by my foundation.
To apply foundation, I usually go in with the #1 brush and then buff it out with a beauty blender or sponge.
After applying fountain, I go back with concealer.
Applying make up in that order allows you to wear less.
I took brush #2 and the #1 concealer and ran it along the bridge of my nose, up to the center of my forehead and just over my brows. I also used this on my chin. Because this is a bit lighter than what a concealer for me should be, I use it to highlight areas of my face.
Buff into skin with Beauty Blender.
Then, I took the same brush and placed the salmon concealer under my eyes (covering any blueish tint from dark circles).
I took concealer #3 to conceal any other redness on the face.
I used concealer #4 (the very dark tone), as a way to contour my face. So I ran it along the hollows of my cheeks, my temples and the sides of my nose.
Buff gently into the skin.
Cheeks:
I then took Tarte's Cheek Stain and rubbed a tiny amount onto the apples of my cheeks with my finger-- blending it up towards the ear but focusing the bulk of the color on the apples.
Set with a light dusting of powder using a #4 Brush.
I then took MAC's strobe cream on my finger and gently dabbed it on the highest point of my cheekbones, my cupid's bow, and just above my brow.
I LOVE using this as a highlighter!
It's super creamy and is more opalescent than glittery, so it sits well on the skin and is soft enough to catch the light without being too distracting.
From there, I lined my lips with Makeup Forever Aqua Lip #1C-- filling them in as well.
Then I took about equal amounts of each gloss and brushed them on with brush #8, leaving my lips with a natural looking lip- something I'm NOT used to! :)
To finish off my look, I dipped my #10 brush in the Espresso eye shadow to softly fill in my brows.
Ta-Da!
The key to creating a soft natural look, is to use lightweight products.
Allowing your skin to shine through makes all the difference in the world-- so take care of that skin!
All of the products I used for this look are ones I absolutely adore. So if you're in need of some new things, give these gems a shot :)
I know that some of you are confused when it comes to makeup brushes. After all, there are SO many of them! While all of them have their purpose, you obviously don't need 100 different types of brushes to accomplish your look.
This post will highlight brush basics, i.e.; types of bristles, uses, etc. I will also compose a list of my bare minimum basic brushes that I think you need to accomplish different looks!
First thing's first, let's start with the basics...
Synthetic VS Natural Hair
Both types of brushes have their purpose and it's important to know so you can get the best results!
Synthetic Bristles:
Synthetic Brush bristles are made of a blend of nylon, acrylic or polyester filaments. These brushes are generally best used for Creams and liquids because they don't absorb too much of the product and they are so easy to clean!
Think...
Foundations
Concealers
Cream shadows
Cream Blush
Lipsticks/glosses
Gel/Liquid liners
Natural Bristles:
Natural Hair brushes are made up of squirrel, pony, and/or badger hair. Each have different textures-- Squirrel is very soft while badger is more firm-- These are great for powder products as they pick up and hold the fine powders very well, making it easy to transfer.
Think...
Eye shadows
Blushes
Bronzers
Setting powders
Creating a brush set
I will tell you, MAC cosmetics has 36 different brushes! So I understand the dilemma of trying to pick out the brushes you need. Here is a quick low maintenance guide of brushes... *For the sake of ease-- I just plucked photo samples of the brushes from MAC's website here. There are LOTS of great companies that make brushes, this was just easiest for me to grab photos :)*
Shadow brush: Having a flat shadow brush is great for packing on shadows.
Having one tightly bound brush is great to pack on color beneath the brow, or on the lid.
*TIP*Natural hair brushes that are tightly bound, hold pigment really well-making it ideal for packing on product, while natural hair brushes that are loosely bound, don't hold as much color and are better for blending.
Blending brush:You need a blending brush! This one is really important-- As Peg from Edward Scissorhands would say, "You must blend and blend and blend!"Blending is key! To create a fluid, more natural look, blending colors and shadows together is so important!
Angle Hair Brush: This brush is SO useful! I use it to apply eye liner, create a smokey look, fill in my brows-- It's so good!
Big Powder Brush:To set your makeup with a powder, you'll need a fluffy brush! This is great for applying a light dusting of powder, or if you apply setting powder with a sponge/puff, using a fluffy brush to tap away excess is perfect for preventing a super cakey look.
Blush Brush:If you have a decent sized powder brush-- not monstrous- you can probably use that also as a blush brush--see rounded blush brush below--But, if you have a few extra $$$ I suggest buying an actual blush brush. I prefer a fluffy domed shape brush.
*TIP*Layering blush in soft light layers is better than packing it on. It's always easier to add than to take away!
Foundation Brush:There are a lot of ways to apply foundation-- hands, sponge, kabuki brush, dome foundation brush.. the list goes on! So this brush is only necessary if you prefer to apply your foundation with a brush.
Foundation brushes are typically synthetic so they don't absorb too much of the product. I often use a standard flat foundation brush to apply the foundation, and then buff it in with a damp sponge.
Concealer Brush: A smaller version of the foundation brush. Another synthetic brush that is often small enough to get in tight places-- under the eyes, around the nose-- If I'm not using my fingers, I use this brush.
Lip Brush:A lip brush is essential for creating flawless, show stopping lips! I think a lip brush is especially important if you are playing with bold lip colors, because if you are, you really need to make sure they are drawn on perfectly.
Here are a few brush sets that I think are pretty close to ideal in a range of prices :)
**Combine the two Eco Tools sets for a full face 12 piece set at $20!**
I think cleaning brushes is EXTREMELYimportant!
I will create a full separate post on how to properly clean your brushes.
In the meantime, I do have an older post that lightly touches on how to clean your brushes and how to make your own spray cleaner for between uses. Check it out HERE.
I hope this guide was helpful and that it gives you a good understanding of what these basic brushes do!